


Mikrofusion von 3D-gedruckten Teilen mit ausbrennbaren Harzen
Mikrofusion oder Wachsausschmelzverfahren ist eines der am weitesten verbreiteten Herstellungsverfahren in der Schmuckindustrie und ist das älteste bekannte Gießverfahren.
Beim Gießen können Metallnachbildungen mithilfe einer Form hergestellt werden, die aus einem traditionell in Wachs modellierten Prototyp hergestellt wird. In diesem Fall werden 3D-gedruckte Teile mit ausbrennbaren Harzen verwendet, um die Wachsmodelle zu ersetzen.
Schmuck kann aus einer Vielzahl von Metallen hergestellt werden, darunter Gold, Platin, Silber und Messing , unter Verwendung des Gießverfahrens. Unten sehen Sie den Mikrofusionsprozess für Schmuck aus 3D-gedruckten Stücken mit ausbrennbaren Harzen:
1- 3D-Druck des Teils
Basierend auf Designs, die mit CAD-Software erstellt wurden die gewünschten Modelle müssen 3D-gedruckt werden. Derzeit ist eine große Anzahl kalzinierbarer Harze von verschiedenen Herstellern erhältlich. Die Verwendung des einen oder anderen Materials hängt vom verwendeten 3D-Drucker und den für die Teile erforderlichen Eigenschaften ab.
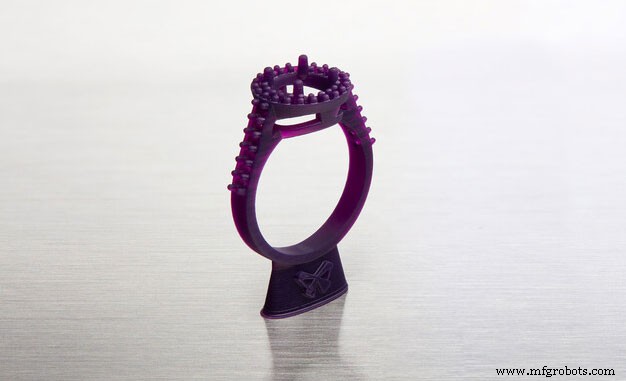
Bild 1:3D-gedruckter Ring mit ausbrennbarem Harz von FormLabs. Quelle:FormLabs.
Einer der beliebtesten 3D-Drucker für den 3D-Druck im Schmuckbereich ist der Form3 des renommierten Herstellers FormLabs. Dieser 3D-Drucker erfordert keine fortgeschrittenen technischen Kenntnisse und kann daher problemlos verwendet werden . Der Form3 3D-Drucker schränkt seine Verwendung dadurch ein, dass nur vom Hersteller entwickelte unterstützende Materialien verwendet werden. Dies kann von Vorteil sein, da keine Einrichtung erforderlich ist und die Konfigurationsparameter und änderbaren Werte auf ein Minimum reduziert werden, da nur der Materialtyp und einige grundlegende Parameter ausgewählt werden müssen. Dadurch wird die Fehlerquote auf ein Minimum reduziert.
Die folgende Tabelle zeigt einige der beliebtesten brennbaren Harze und ihre Kompatibilität mit 3D-Druckern:
| Harz | Hersteller | Technologie | Kompatibilität |
|---|---|---|---|
| Gießbares Wachs | FormLabs | SLA | Formular 2, Form 3, Form 3L, Form3+ |
| Gießbares Wachs 40 | FormLabs | SLA | Formular 2, Form 3, Form 3L, Form3+ |
| zWax Bernstein | UniZ | LCD | Slash, Slash 2, Slash 2 Plus, Slash 2 Pro |
| zWax Purple | UniZ | LCD | Slash, Slash 2, Slash 2 Plus, Slash 2 Pro |
| Bluecast-Original | Zortrax | LCD | UniZ, WANHAO, zortrax, ANYCUBIC, ASIGA, B9 Creator, FLASH FORGE Moon Ray, Prusa. |
| Bluecast X5 | Zortrax | LCD | UniZ, WANHAO, zortrax, ANYCUBIC, ASIGA, B9 Creator, FLASH FORGE Moon Ray, Prusa. |
| Bluecast X10 | Zortrax | LCD | UniZ, WANHAO, zortrax, ANYCUBIC, ASIGA, B9 Creator, FLASH FORGE Moon Ray, Prusa. |
| Dental Cast | Harz Labs | LCD | Formlabs, PEOPOLY, UniZ, WANHAO, zortrax, ANYCUBIC, ASIGA, B9 Creator, FLASH FORGE Moon Ray, Prusa. |
Table 1:Burn-out resins and compatibility. Source:Filament2print.
Each material has different properties and requires different parameters. However, they all have a common characteristic:they have been developed to replace wax parts in the microfusion process, with a composition that achieves castings free of residues that could affect the final result of the parts.
Once the parts have been printed, they must be cured if the material requires it. This depends on the composition of the resin and the manufacturer's advice should always be followed to achieve an optimum result.
2- Wax tree
Once the parts are cured (in cases where this step is required), the removal of the backing can be carried out, always with great care. Sandpaper (400 grit or higher) or even a rotary tool with a polishing attachment can be used to achieve total removal of the support and a perfect finish.
To create the wax tree, a wax base is taken and attached to a rubber cover of the sprue. Small cylindrical wax rods are welded to the wax base using a heat tool. The 3D printed parts are welded to the other end of the bars.
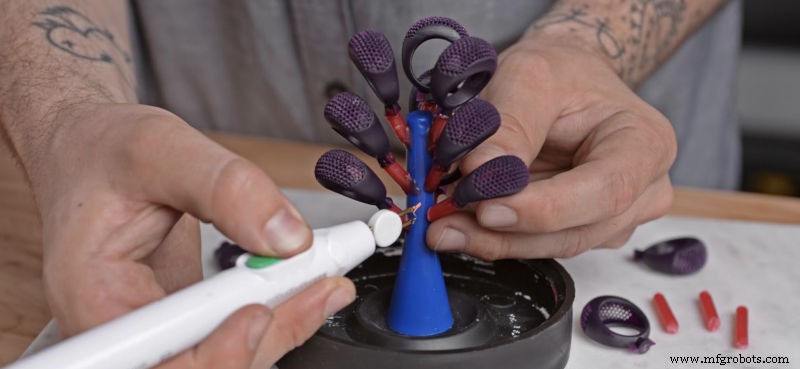
Image 2:Casting wax tree. Source:FormLabs.
This process is similar to that carried out in microfusion when casting traditionally carved wax pieces.
3- Mould preparation
The wax tree with the 3D printed parts in burn-out resin is to be placed inside a refractory steel cylinder, which is to be fitted into the rubber cylinder cover. In case the refractory steel cylinder has holes, these should be covered by wrapping the cylinder in adhesive tape.
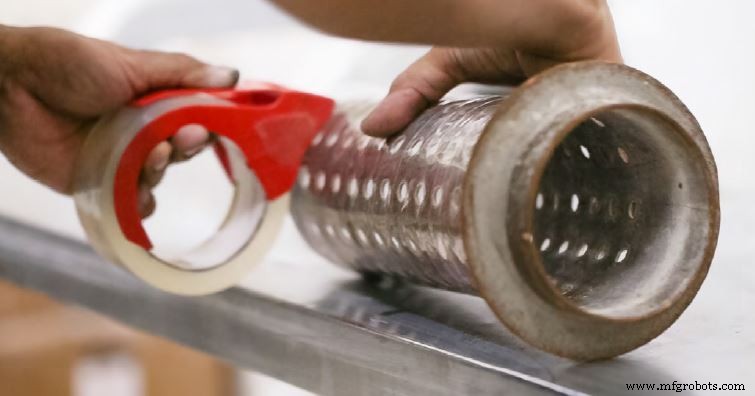
Image 3:Refractory steel cylinder shell. Quelle:Formlabs.
The casting must then be poured slowly, always from the side of the cylinder to avoid damaging the tree with the parts 3D printed with calcineable resin.
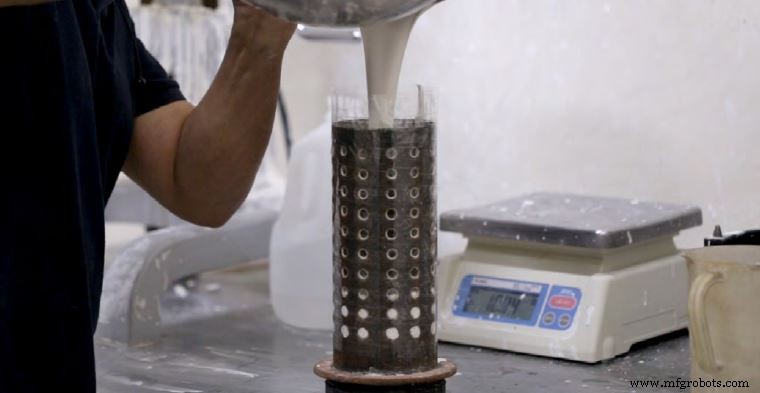
Image 4:Pouring of the casting into a refractory steel cylinder. Quelle:Formlabs.
When pouring the casting, it is possible that small air pockets may remain which can affect the quality of the final parts. For this reason, it is very important to carry out the degassing process in a vacuum chamber.
4- Burnout
The cylinder is placed in the oven following the time and temperature instructions recommended by the manufacturer. During this time, the wax will burn out without leaving residues, leaving the mould ready.
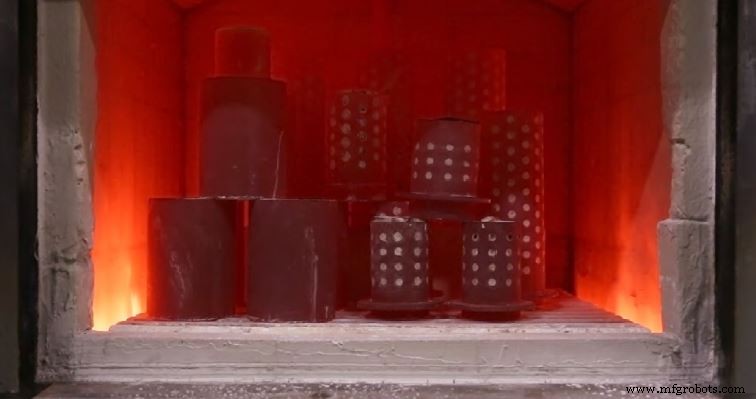
Image 5:Burnout process. Quelle:Formlabs.
The desired metal must then be poured into the mould to produce the final parts.
5- Washing and polishing
After casting, the mould is carefully removed from the furnace and immersed in water using tongs. During this process, the casting will melt, leaving the metal parts visible. Once washed, the metal parts are separated from the tree, polished and polished until the desired finish is achieved.
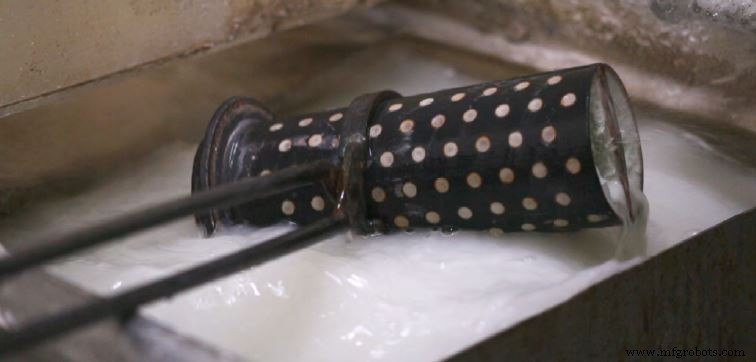
Image 6:Washing process. Quelle:Formlabs.
Once washed, the metal parts are separated from the tree, polished and polished to the desired finish.
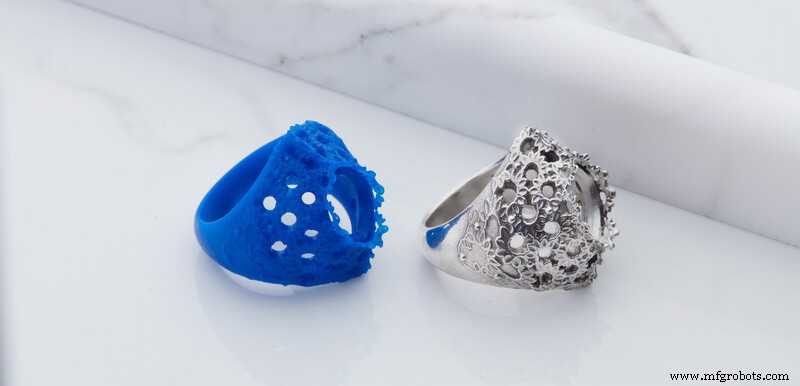
Image 7:3D printed ring with burn-out resin and silver ring after the microfusion process. Quelle:Formlabs.
The use of castable resins in the jewellery sector offers numerous advantages . Among others, it allows you to 3D print as many models as you want, quickly and with extreme precision . This results in a significant reduction in costs and production times.
3d Drucken
- Schweißen und Kleben von 3D-gedruckten Kunststoffteilen
- Sollten Sie Ihre 3D-gedruckten Teile intern fertigstellen?
- Endbearbeitung von 3D-gedruckten Teilen mit… Buntstiften?
- Eine Einführung in den 3D-Druck mit selektivem Lasersintern
- 3D-Druck mit Harzen:Eine Einführung
- Metallteile leichter machen mit Metall-3D-Druck
- Drucken der Sicherung 1 mit der Sicherung 1
- Ersetzen von Aluminiumteilen durch 3D-gedruckte Kohlefaser
- Bessere Qualitätskontrolle mit 3D-gedruckten Teilen
- Schnallen Sie sich an mit funktionalen 3D-gedruckten Teilen!